
Sauces & Condiments
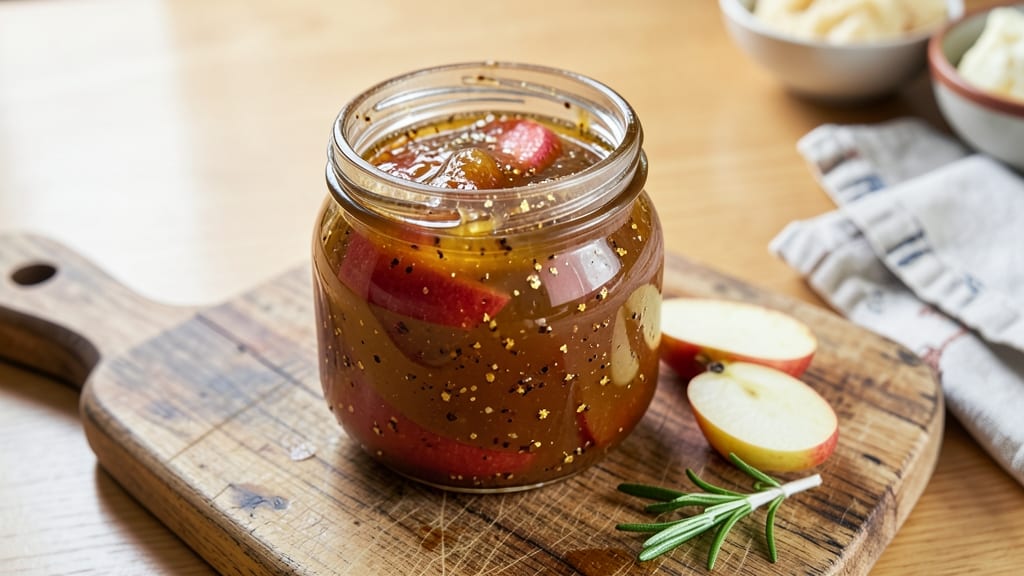
This apple garlic jam recipe transforms humble ingredients into a sophisticated condiment that bridges sweet and savory with perfect balance. The slow simmering process develops deep caramel notes while preserving the garlic's aromatic complexity, creating a spreadable jam with remarkable versatility.
What starts as simple fruit and aromatic cloves becomes a restaurant-quality accompaniment that elevates everything from grilled meats to crusty bread.
The secret lies in precise sugar-to-fruit ratios and controlled simmering time, which prevents the jam from becoming overly syrupy while ensuring it maintains its natural texture.
Unlike traditional fruit preserves, this version incorporates garlic in a way that enhances rather than overpowers the sweetness, delivering layers of flavor that build with each bite.
The result is a jam that's equally at home drizzled over roasted vegetables or stirred into yogurt as it is spooned directly from the jar.
What makes this recipe particularly practical is its shelf-stable nature when properly processed—perfect for gifting or keeping on hand for spontaneous meal enhancements. The natural pectin in apples combined with the right amount of sugar creates a jam that thickens beautifully without requiring commercial pectin.
This means you're getting a product that's both healthier and more flavorful than anything you'd find in stores.
Once you've mastered the technique, the possibilities for variations are endless—adding citrus zest for brightness, herbs for complexity, or even a touch of spice for warmth. The foundation, however, remains the same: balancing sweetness with savory depth through careful cooking.
Let's create this versatile condiment that will become a staple in your kitchen.
Ingredients for apple garlic jam
Eight ingredients transform into a sophisticated jam balancing sweetness with aromatic depth for versatile pairing.
| Ingredient | Amount | Notes |
|---|---|---|
| Honeycrisp Apples 🍎 | 4 medium | Peeled, cored, sliced thin |
| Garlic Cloves 🧄 | 6 whole | Minced finely for even distribution |
| Granulated Sugar 🍚 | 2 cups | White sugar preferred for clarity |
| Lemon Juice 🍋 | ¼ cup | Freshly squeezed, strained |
| Apple Cider Vinegar 🍶 | 1 tbsp | For preservation and balance |
| Ground Cinnamon 🌿 | ½ tsp | For subtle warmth |
| Salt 🧂 | ¼ tsp | Diamond Crystal preferred |
| Fresh Ginger 🌿 | 1 inch | Peeled, grated finely |
The apples form the jam's foundation, so choose Honeycrisp or Fuji for their natural sweetness and firm texture. Local farmers markets often carry these varieties at peak season, offering fresher fruit with better flavor. If using store-bought, inspect for vibrant color and firmness—avoid any with bruising or soft spots. The garlic should be fresh, plump cloves with no green shoots, as this indicates potency. For the sugar, Domino or C&H brands are reliable for consistent granulation, though any white sugar works. The lemon juice and vinegar should be freshly squeezed and organic when possible to enhance the natural flavors.
Substitutions are possible but require adjustments. Granny Smith apples add tartness—reduce sugar to 1.5 cups. No fresh ginger? Ground ginger at half the amount works, though texture differs. Vinegar-free? Extra lemon juice (1 tbsp more) preserves the jam. For a smoother texture, blend the apples before cooking. The cinnamon can be omitted if you prefer a cleaner flavor profile, but it's worth including for that subtle warmth that complements the garlic. If you lack Diamond Crystal salt, any fine sea salt works, but taste as you go—the flavor balance is delicate.
This jam thickens as it cools, so process it in a clean glass jar for shelf stability. Store in a cool, dark place for up to 3 months unrefrigerated, or 6 months in the fridge for extended freshness. The natural pectin in apples ensures proper thickening without commercial additives. For gifting, use small jars with airtight seals. Reheat gently in a saucepan if the jam thickens too much during storage—just add a splash of water and simmer until smooth.
Why You'll Love This Recipe
- No Chopping Needed: I swear by this—just core those Honeycrisp apples and toss the chunks in whole. The garlic stays clove-sized for that real bite, no mincing required. Honestly, I’ve made this while scrolling through my phone.
- Sweet-Savory Magic: That first spoonful? Chef’s kiss. The Honeycrisp’s natural sweetness caramelizes with the sugar, while the garlic and vinegar cut through like a bright, tangy hug. It’s the kind of jam that makes you pause mid-bite.
- Pantry Staple Upgrade: Use it on toast, drizzle it over yogurt, or toss it with roasted pork—it’s my go-to for turning simple meals into something special. Between us, it’s also the secret ingredient in my holiday charcuterie board.
- Lasts for Weeks: Make a big batch and forget about it. The vinegar and lemon juice keep it fresh for months, and the sugar preserves it beautifully. I’ll be real: I’ve had jars sitting since last fall, and they’re still good.
Step-by-step instructions for slow-simmered apple garlic jam
Transforming fresh apples and aromatic garlic into a luscious, balanced jam requires patience and precision.
Prepare the Apple and Garlic Base
In a large, heavy-bottomed saucepan, combine the 4 medium Honeycrisp Apples (previously peeled, cored, and thinly sliced) with the 6 whole Garlic Cloves (minced finely). The apples should be evenly distributed to ensure consistent cooking. Add the 1 inch Fresh Ginger (peeled and finely grated) and the 0.5 tsp Ground Cinnamon. Stir gently to combine, ensuring the spices coat the apple slices evenly.
This step is where the foundational flavors develop. The garlic and ginger will infuse the apples as they soften, creating a complex aromatic base. Avoid overcrowding the pan—this prevents even heat distribution and can lead to uneven cooking. If your pan is too small, work in batches, but aim for a single, unified simmer.
Simmer with Sugar and Acid
Pour in the 2 cups Granulated Sugar and stir until fully dissolved, breaking up any clumps. Add the 0.25 cup Lemon Juice and 1 tbsp Apple Cider Vinegar, then bring the mixture to a gentle boil over medium-high heat. Once boiling, reduce the heat to medium-low and let it simmer uncovered for 45-50 minutes. Stir occasionally to prevent sticking and ensure even caramelization.
You’ll notice the mixture thicken and darken as it simmers. The sugar will dissolve initially, but as the apples break down, the jam will transform into a glossy, syrupy consistency. This stage is critical—too high heat risks burning the sugar, while too low heat will prolong the process without proper reduction. Watch for the edges to pull away slightly from the pan, signaling the jam is nearing readiness.
Test for Doneness and Finish
After 45-50 minutes, perform the "plate test" to check for doneness. Spoon a small amount of the jam onto a chilled plate and let it cool for 1 minute. If it wrinkles slightly when pushed with a finger, it’s ready. If not, return it to the pan and simmer for another 5-10 minutes, stirring frequently. The jam should coat the back of a spoon smoothly and hold its shape when cooled.
Once the jam reaches the desired consistency, stir in the 0.25 tsp Salt and give it one final taste. Adjust the balance of sweetness and acidity if needed—add a splash of lemon juice for brightness or a pinch more sugar if it’s too tart. The salt enhances the flavors and rounds out the jam’s complexity. Remove from heat immediately to preserve its vibrant color and texture.
Bottle and Store for Freshness
Transfer the hot jam to a clean, sterilized jar or airtight container using a ladle or spoon. Tap the jar gently on the counter to release any air bubbles trapped in the jam. Seal the jar tightly while the jam is still warm to create an airtight seal, which helps preserve its freshness.
Let the jar cool to room temperature, then refrigerate. This jam will keep in the refrigerator for up to 3 months, though its rich flavors are best enjoyed within 2 months. The slow simmering process concentrates the natural sweetness and preserves the apple’s delicate texture, making this jam perfect for drizzling over yogurt, cheese boards, or pairing with roasted meats. The garlic and ginger notes will mellow slightly over time, deepening the jam’s complexity.
Pro Tips For Making Apple Garlic Jam
- Peel the Garlic Right: Smash whole cloves with the flat side of your knife first—it cracks the skin without crushing the flesh. I used to peel them raw and lose half the flavor to burning before they even softened.
- Core Apples Like a Pro: Cut out the core in one clean slice with a paring knife, then chop the fruit into even ½-inch cubes. Uneven pieces mean some cook mushy while others stay raw—no one wants that fight in your jam.
- Simmer Low and Slow: Reduce heat to a bare simmer after the first 10 minutes—boiling turns the jam into apple mush. I learned this after making a sticky, watery mess that stuck to the pot like regret.
- Vinegar First, Not Last: Add the apple cider vinegar and lemon juice at the start, not the end. It brightens the flavor faster and cuts through the sweetness before the sugar crystallizes—trust me, your taste buds will notice.
Make-ahead tips for this recipe
Prep Ahead Strategy
Peel, core, and slice the 4 Honeycrisp apples up to 3 days ahead and store them in an airtight container lined with a damp paper towel. This prevents browning while keeping them crisp. I like to store them in the fridge to maintain freshness—just bring to room temperature before cooking.
For the garlic, peel and mince the 6 cloves and store in a small jar with a splash of water to keep them fresh for up to 5 days. 🍎
Sugar Dissolving Shortcut
Dissolve the 2 cups granulated sugar in ¼ cup warm water before adding it to the pan. This eliminates clumps and speeds up the process by 10-15 minutes.
Stir the sugar mixture until completely clear, then pour it into the simmering apples. The warm water helps the sugar integrate smoothly, preventing graininess in the final jam.
Flavor Development Timeline
Let the jam sit overnight at room temperature after the initial simmer. This allows the flavors to meld more deeply, creating a richer, more complex taste. I cover the jar loosely with a lid or plastic wrap to prevent drying while still allowing some airflow.
The next day, reheat the jam gently on the stove for 5-10 minutes to restore its spreadable consistency before using. This step is optional but transforms the jam from good to extraordinary. ⏳
Batch Freezing for Gifting
Portion the jam into small, sterilized jars (about ½ cup per jar) and freeze them for up to 3 months
When ready to use, thaw at room temperature or reheat gently in a saucepan with a splash of water to restore texture. Plan your jam-making for a weekend when you have time to simmer and let it cool. Start the process in the morning, and by evening, you’ll have a beautifully thickened jam ready for storage. If you’re short on time, use a slow cooker on low for 4-5 hours instead of stovetop simmering—just monitor the heat to prevent overcooking. The slow cooker method is especially useful for larger batches or when you want to multitask during the day. 💡 If your jam thickens too much during storage, reheat it in a saucepan over low heat with 1-2 tablespoons of water. Stir constantly until it reaches a smooth, spreadable consistency—about 3-5 minutes. Avoid high heat, which can burn the sugar and overpower the delicate apple and garlic flavors. For best results, reheat only what you plan to use immediately, as the jam will thicken again as it cools. 🔥Make-Ahead Cooking Schedule
Reheating for Serving
Nutrition facts
Frequently asked questions
Can I substitute regular apples for Honeycrisp in this recipe?
Yes, but choose varieties with natural sweetness like Fuji or Gala—they'll work well without adjusting sugar. Tart apples like Granny Smith require reducing sugar to 1.5 cups to balance the flavor. The key is selecting apples that are firm and free of bruises to prevent a watery jam.
How do I know when the apple garlic jam is done cooking?
Use the "plate test": spoon a small amount onto a chilled plate and let it cool for 1 minute. When it wrinkles slightly when pushed with your finger, it's ready. The jam should also coat the back of a spoon smoothly and hold its shape. Simmering too long risks burning the sugar and overpowering the delicate garlic flavor.
Can I make this jam without vinegar or lemon juice?
Yes, but omit 1 tablespoon of sugar to compensate for the missing acidity. The vinegar and lemon juice serve dual purposes: they balance sweetness and act as natural preservatives. Without them, the jam will still taste good but may spoil faster—aim to use it within 2 weeks instead of months.
What are the best ways to use apple garlic jam?
This jam shines drizzled over grilled meats, stirred into Greek yogurt, or spread on toasted baguette slices. It also elevates cheese boards when paired with aged cheddar or brie, or adds depth to pasta sauces when simmered with olive oil. The balance of sweet and savory makes it incredibly versatile!
Why did my jam turn out too runny?
This usually happens from either undercooking or using apples with too much moisture (like overripe fruit). Next time, simmer 5-10 minutes longer and check for doneness with the plate test. For immediate fixes, simmer the runny jam uncovered over low heat for 10-15 minutes to reduce the liquid. Adding 1 teaspoon of cornstarch mixed with water can also help thicken it.