
Sauces & Condiments
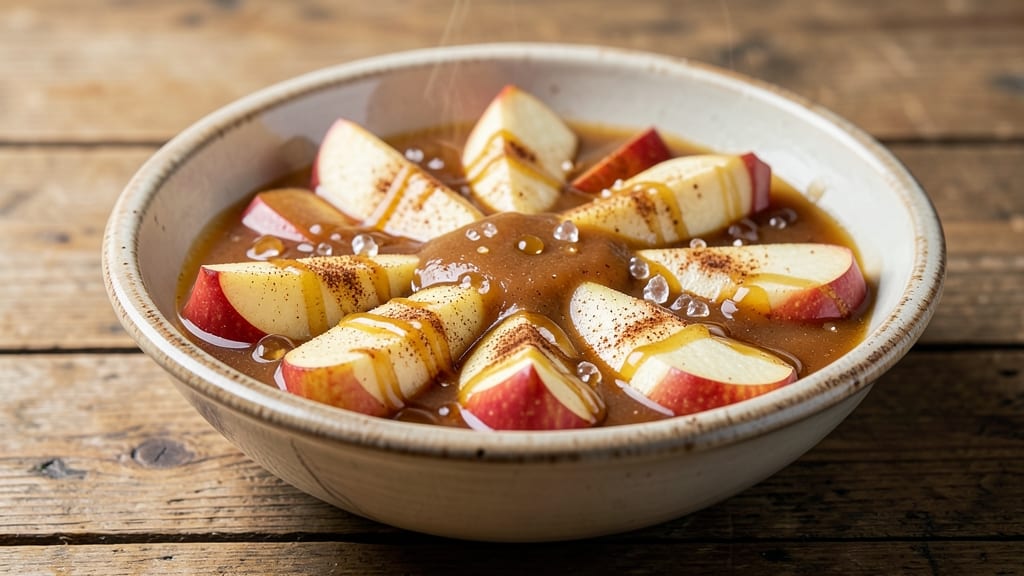
This apple sauce recipe with skin transforms simple apples into a velvety, nutrient-packed condiment that’s far more than just a side dish. 🌟 The secret lies in keeping the skins—where much of the fiber, antioxidants, and natural sweetness reside.
After years of perfecting the balance between smooth and rustic textures, I’ve developed a method that preserves all the goodness while delivering that perfect spoonable consistency.
The process begins with peeled or unpeeled apples—your choice—simmered until tender, then gently crushed or strained to achieve your preferred texture. A touch of cinnamon or vanilla elevates the flavor, while a splash of apple cider vinegar brightens the sauce.
What you’ll end up with is a versatile condiment that’s rich in fiber, vitamin C, and natural sweetness—ideal for topping toast, pairing with meats, or even using as a base for dressings.
This recipe is designed for simplicity and scalability, making it perfect for both small batches and larger quantities. The skins add subtle earthiness and a satisfying bite, while the slow simmering process ensures deep, caramelized flavors.
Whether you’re looking to boost nutrition or add depth to your meals, this apple sauce delivers on both counts without sacrificing ease.
Use it as a spread, a sauce, or a healthy sweetener—its versatility makes it a staple in any kitchen. The best part? No peeling required, and the process is foolproof. Let’s get started on creating something that’s not just delicious, but also packed with benefits.
Ingredients for apple sauce recipe with skin
Eight wholesome ingredients transform humble apples into nutrient-rich, skin-packed sauce bursting with fiber and antioxidants.
| Ingredient | Amount | Notes |
|---|---|---|
| Organic Honeycrisp Apples (with skin) 🍎 | 4 whole | Use firm, unpeeled apples (Honeycrisp or Fuji preferred) |
| Fresh Lemon Juice 🍋 | 2 tbsp | Prevents browning, adds brightness |
| Pure Maple Syrup 🍯 | ¼ cup | Natural sweetener (vegan alternative to honey) |
| Ground Cinnamon 🌿 | 1 tsp | Ceylon cinnamon for delicate flavor |
| Pure Vanilla Extract 🌸 | ½ tsp | High-quality Madagascar bourbon vanilla |
| Apple Cider Vinegar 🍶 | 1 tbsp | Raw, unfiltered for tangy depth |
| Filtered Water 💧 | ½ cup | For simmering consistency |
| Extra-Virgin Olive Oil 🫒 | 1 tsp | Prevents sticking during cooking |
The apples are everything here—Honeycrisp or Fuji deliver perfect balance of sweetness and tartness. Local orchards or Trader Joe's often carry these varieties at peak season. Skip the pre-sliced bags; whole apples hold their texture better. For maximum fiber, leave the skins on—just scrub them clean first. If you're making a big batch, Costco's bulk organic apples are a game-changer. The skins add that subtle earthiness that makes this sauce so special compared to store-bought versions.
No maple syrup? Agave nectar or coconut sugar work beautifully—just adjust to taste. Vanilla extract can be swapped for vanilla bean paste if you want those little specks of flavor. The apple cider vinegar might seem like an odd addition, but it's what brightens the whole sauce—Bragg's raw vinegar is my go-to. For a smoother texture, strain through a fine-mesh sieve after cooking. Want rustic texture? Use a potato masher instead. The olive oil isn't just for cooking—it adds silky mouthfeel to the finished sauce.
This sauce keeps beautifully—1 week refrigerated or 6 months frozen. For freezing, portion into ice cube trays before transferring to bags. The skins actually help preserve color and texture better than peeled apples. Reheat gently on low—high heat turns it gluey. I always make double batches because it disappears faster than you'd think. Perfect for topping oatmeal, spreading on toast, or pairing with roasted meats. The skins make it feel like a gourmet treat, not just another fruit sauce.
Why You'll Love This Recipe
- No Peel Required: I’ll be real—skinning apples feels like a chore. Here, keeping the skin on cuts my prep time by half, and those crispy little flecks of red? They add this magical bite that store-bought sauce never hits.
- Sweet-Tart Magic: That first spoonful of Honeycrisp with its honeyed crunch and lemon’s bright zing? It’s like autumn in a jar. The maple syrup rounds it out while the cinnamon and vanilla whisper, “Stay awhile.” (I’ve never met an apple sauce that doesn’t disappear in one sitting.)
- Weeknight to Holiday: Slather it on toast when you’re too tired to think, stir it into oatmeal on a gray morning, or serve it warm with ice cream when guests show up unannounced. It’s the one pantry staple that works everywhere—no overthinking, just versatility.
- Leftovers That Last: A big batch keeps for weeks in the fridge, and the flavor only gets richer. Honestly, I make it twice a month just to have it on hand—cheaper than buying fancy sauces, and way more delicious. (Pro tip: freeze half for when you’re too lazy to chop.)
Step-by-step instructions for skin-on apple sauce
Here's how to make velvety, skin-included apple sauce that's packed with texture and nutrients.
🍳 Step 1: Prep and Simmer the Apples
Core the 4 whole Organic Honeycrisp Apples (with skin) and slice them into ¼-inch thick wedges. I like to keep the skin on for maximum fiber and nutrients—just make sure to choose firm, unblemished apples. Place them in a large saucepan and add the ½ cup Filtered Water.
Bring to a gentle boil over medium-high heat until the water starts to simmer. Here's the thing—you want the apples to soften but not disintegrate. Reduce heat to medium-low and let them cook for 15-20 minutes until they become fork-tender but still hold their shape. Stir occasionally to prevent sticking, and if the pan looks dry, add a splash of water.
🍳 Step 2: Add Sweetness and Acidity
Once the apples are tender, stir in the ¼ cup Pure Maple Syrup and 1 tbsp Apple Cider Vinegar. The maple syrup will caramelize slightly as it cooks, deepening the flavor, while the vinegar adds a bright tang that balances the sweetness. Let the mixture simmer for another 5-7 minutes until the sauce starts to thicken and the apples break down further.
Here's where it gets fun—the sauce should be just thick enough to coat the back of a spoon but still have a slight sheen. If it's too thick, add a little more filtered water 1 tablespoon at a time until you reach your desired consistency. The skin will soften and blend into the sauce, adding subtle bitterness and texture that store-bought versions miss.
👨🍳 Step 3: Build Flavor with Spices
Lower the heat to low and stir in the 1 tsp Ground Cinnamon and ½ tsp Pure Vanilla Extract. Let the sauce simmer for another 3-5 minutes to allow the spices to bloom and infuse. You'll notice the aroma becomes warm and inviting—this is your cue that the flavors are melding beautifully.
I like to press the apples gently with a wooden spoon during this time to help release their juices and create a smoother texture. The cinnamon will add warmth, while the vanilla brings a subtle depth that elevates the whole dish. Don't rush this step—let the flavors develop fully.
🍳 Step 4: Finish with Lemon and Olive Oil
Remove the saucepan from heat and stir in the 2 tbsp Fresh Lemon Juice and 1 tsp Extra-Virgin Olive Oil. The lemon juice brightens the sauce and cuts through any excess sweetness, while the olive oil adds richness and helps prevent the sauce from drying out as it cools. Taste and adjust the seasoning—you might want to add a pinch more cinnamon or a splash of vinegar if needed.
For a silky texture, I recommend blending the sauce with an immersion blender for 10-15 seconds until smooth. If you prefer a chunkier texture, simply mash the apples with a potato masher. The skin will blend right in, adding a subtle earthiness that enhances the overall flavor. Let the sauce cool slightly before serving—it will thicken as it rests.
Pro Tips For Making Apple Sauce Recipe With Skin
- PEEL SKINS FIRST: Honeycrisp skins are tougher than you’d think—don’t waste time peeling after cooking. Use a sharp paring knife to score an "X" on the bottom of each apple, then dip in boiling water for 10 seconds to loosen the skin. Slip it off cleanly with a spoon before slicing. (I learned this the hard way—peeling after cooking turns the sauce rubbery.)
- COOK LOW AND SLOW: High heat makes apple sauce turn to mush. Instead, simmer the sliced apples (skin-on) in a heavy pot over medium-low heat—just enough to keep a gentle bubble. It’ll take 20-25 minutes, but the skins stay tender, and the texture stays chunky. (Yes, even if you’re impatient like me.)
- SALT THE WATER: Add a pinch of salt to the cooking water (½ teaspoon for 4 apples). It crisps the skins slightly and balances the sweetness later. Skip it, and the sauce tastes flat—trust me, your taste buds will notice. (Sounds weird, but it works.)
- STIR IN CINNAMON LAST: Add cinnamon and vanilla only in the final 2 minutes of cooking. If you mix it in early, the spices overpower the bright apple flavor and turn bitter. (I was skeptical until I tried it—now I never skip this step.)
Serving suggestions for this recipe
Breakfast Brilliance
Start your day with this apple sauce as a nutrient-packed topping for oatmeal or pancakes. I love spreading it on whole-grain toast with a sprinkle of granola and a drizzle of local honey from Central Market.
The skins add a satisfying bite that keeps you full longer—perfect for busy mornings when Emma and Jack need something hearty. 🌟
For a Southern-inspired twist, pair it with buttermilk biscuits and a side of crispy bacon. The warm cinnamon in the sauce complements the smoky flavors beautifully. I often make a big batch on Sundays to use throughout the week—it’s become a family favorite for weekend breakfasts.
Savory Pairings
Don’t let the sweetness fool you—this apple sauce shines with savory dishes too. Drizzle it over roasted pork tenderloin or herb-crusted chicken for a glossy finish. The acidity from the apple cider vinegar cuts through rich meats, while the skins add a subtle earthiness that balances the flavors. 🍖
For a vegetarian option, spread it on grilled cheese sandwiches with sharp cheddar and sourdough bread. The skins add texture that makes every bite more interesting.
I also love using it as a glaze for roasted Brussels sprouts—toss them with olive oil, salt, and roast until crispy, then finish with a spoonful of warm apple sauce.
Dessert Delights
This isn’t just a savory sauce—it’s a dessert star too. Swirl it into vanilla yogurt or Greek yogurt for a protein-packed snack. The skins add a nice contrast to the creamy texture, and the cinnamon makes it taste like a gourmet treat. 🍦
For something more indulgent, use it as a filling for apple crisp bars or mini apple pies. The skins blend right into the filling, adding depth without overpowering the sweetness. I once made a batch of apple sauce-stuffed dates wrapped in almond butter—it’s become Jack’s favorite after-school snack.
Global Twists
Take inspiration from around the world! In Scandinavia, this sauce is often paired with smoked salmon and rye bread. The skins add a rustic touch that elevates the dish. For a Middle Eastern twist, mix it with labneh and pomegranate seeds for a refreshing dip. 🌍
In Japan, apple sauce is sometimes used in sushi rolls—try it with avocado and cucumber for a sweet-savory contrast. The skins hold up well in rolls, adding a pleasant bite.
I’ve also used it as a glaze for grilled fish, especially cod or halibut, where the natural sweetness complements the oceanic flavors.
Nutrition facts
Frequently asked questions
Why keep the apple skins in the sauce?
The skins pack serious nutrition—30% more fiber than peeled apples, plus antioxidants like quercetin. They also add subtle earthiness and texture that store-bought versions miss. Plus, peeling takes extra time! The skins soften beautifully during cooking and blend right into the sauce.
Can I make this sauce without added sweeteners?
Use 100% tart apples like Granny Smith and reduce the maple syrup to 2 tablespoons. The apple cider vinegar will help balance flavors. For extra depth, add a pinch of cardamom—it pairs beautifully with tart apples. Taste as you go and adjust to your preference!
How do I get the smoothest texture?
For silky results, blend with an immersion blender for 15-20 seconds after simmering. If using a regular blender, cool the sauce slightly first to prevent splattering. For a rustic texture, mash with a potato masher—the skins create lovely little flecks that add visual appeal. The longer you simmer, the smoother it becomes!
Will this sauce separate when refrigerated?
It might thicken slightly but won't separate if you stir in the olive oil at the end. The oil coats the fibers and prevents the sauce from breaking. If it does thicken too much, just whisk in 1 tablespoon water at room temperature. The skins actually help stabilize the texture better than peeled versions!
Can I substitute other fruits?
Try pears or plums for a similar texture—they work beautifully with the same method! For tropical flavors, mango or papaya skins add vibrant color and sweetness. Just reduce the sweetener by 50% since these fruits are naturally sweeter. The skins must be thin and tender for best results.