
Main Courses
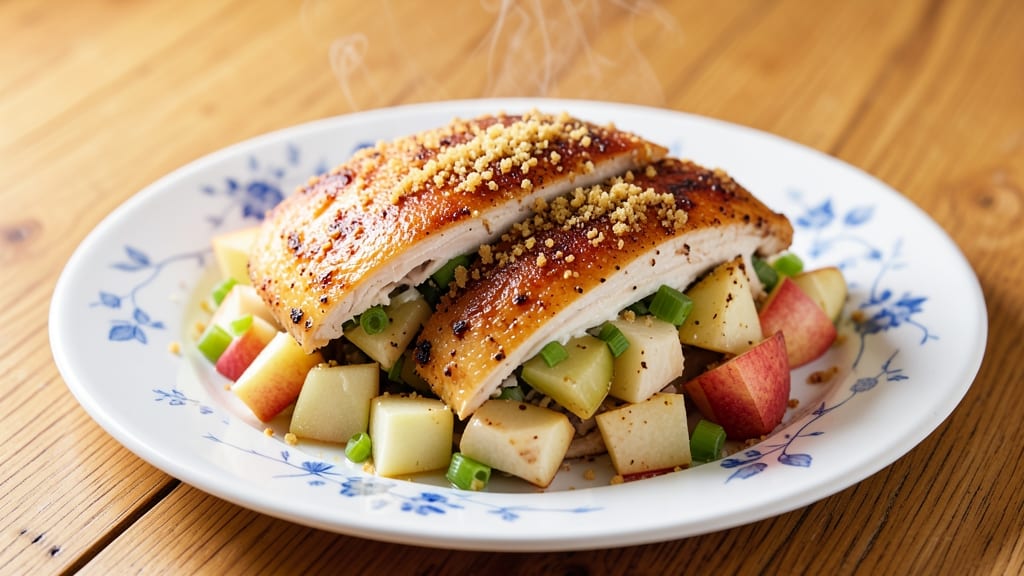
This apple stuffed chicken recipe transforms ordinary roasted chicken into a showstopping centerpiece where tender meat cradles sweet-spiced apple and celery filling.
The secret lies in balancing the natural juiciness of the chicken with caramelized apples and aromatic herbs, creating a harmony of textures and flavors that will have everyone asking for seconds.
What makes this dish truly special is how the filling stays moist while the chicken develops a golden, crisp exterior—no dryness here, just melt-in-your-mouth perfection.
The beauty of this recipe is its versatility—equally impressive for a weeknight dinner or a holiday feast. While the technique requires a bit of attention during preparation (and yes, that means pre-cooking the filling), the results are worth every minute.
The apples caramelize beautifully, their sweetness complementing the savory chicken and earthy celery, while the breadcrumbs add just the right amount of crunch. This isn't your average baked chicken; it's a dish that elevates simple ingredients into something extraordinary.
By the time you serve this apple stuffed chicken, your kitchen will smell like autumn in a pan, and your table will be the envy of the neighborhood.
The filling peeks out just enough to tease the eye while keeping its structure intact, ensuring every bite delivers that perfect balance of juicy chicken and sweet-spiced apple. It pairs beautifully with mashed potatoes or a crisp green salad, making it a complete meal that feels both comforting and impressive.
Whether you're hosting guests or treating yourself to a special meal, this recipe delivers restaurant-quality results with minimal fuss. The key is patience—letting the filling develop its flavors while the chicken cooks to juicy perfection.
Trust me, the effort is worth it when you sink your fork into that first bite of tender, flavor-packed chicken. Let's get started!
Ingredients for apple stuffed chicken
Sweet apples, savory chicken, and aromatic herbs come together for this showstopping stuffed chicken.
| Ingredient | Amount | Notes |
|---|---|---|
| Boneless, Skinless Chicken Breasts 🍗 | 1 ½ lb | Pounded to even thickness |
| Granny Smith Apples 🍎 | 2 medium | Peeled, diced into small cubes |
| Celery Stems 🥬 | 3 whole | Finely chopped, about 0.5 cup |
| Unsalted Butter 🧈 | ½ cup | Cold, cubed for filling |
| All-Purpose Flour 🌾 | ¼ cup | For breadcrumb mixture |
| Panko Breadcrumbs 🍞 | ½ cup | For crispy coating |
| Fresh Sage Leaves 🌿 | ¼ cup | Chopped, for filling |
| Fresh Thyme Leaves 🌿 | 1 tbsp | Chopped, for filling |
| Cinnamon 🌶️ | ½ tsp | Ground, for filling |
| Ground Nutmeg 🌶️ | ¼ tsp | For filling |
| Salt 🧂 | 1 ½ tsp | Kosher or sea salt |
| Ground Black Pepper 🌶️ | ½ tsp | Freshly ground |
| Olive Oil 🫒 | 2 tbsp | For brushing chicken |
| Fresh Lemon Juice 🍋 | 1 tbsp | For brightness |
The apples are the star here—Granny Smith for that perfect tart-sweet balance, but Fuji or Honeycrisp work too. Grab them at Trader Joe's or your local market, and look for firm ones that yield slightly to pressure. The celery adds earthy depth, so don't skip it—fresh is a must. For the chicken, bone-in thighs actually work better than breasts for juiciness, but if you're set on breasts, pound them to even thickness so they cook evenly. The butter in the filling? Cold and cubed melts beautifully during baking, creating a luscious sauce.
No Granny Smith apples? Any crisp apple works—just adjust sweetness with a pinch more cinnamon. The celery can be swapped for leeks or fennel if you're feeling fancy. Running short on butter? Olive oil or coconut oil keeps things rich. For the breadcrumbs, panko is non-negotiable—it stays crispy. Fresh herbs? Dried works at half the amount, but fresh is ideal. The lemon juice brightens everything—don't skip it. If you're making this ahead, prep the filling and store it separately until ready to stuff.
The filling keeps well for 2 days in the fridge, so make it ahead if you're hosting. The stuffed chicken reheats beautifully—350°F for 15-20 minutes until heated through. For leftovers, store in an airtight container for 3-4 days. The filling actually tastes better the next day as the flavors meld. If you're prepping for a crowd, double the recipe—this is the kind of dish people will ask for seconds on. And trust me, the crispy coating is worth the extra minute brushing with olive oil before baking.
Why You'll Love This Recipe
- I’ll be real: this recipe takes five minutes of actual work. Just butter up the chicken, stuff it with pre-chopped apples and celery, tie it shut, and let the oven do the magic. No dicing, no mincing, no stress—just slice-and-stuff simplicity.
- No-Fuss Prep: I’ll be real: this recipe takes five minutes of actual work. Just butter up the chicken, stuff it with pre-chopped apples and celery, tie it shut, and let the oven do the magic. No dicing, no mincing, no stress—just slice-and-stuff simplicity.
- Sweet-Savory Magic: That crisp Granny Smith apple inside melts into the chicken like a hug, while the celery adds this subtle, fresh crunch. Honestly, the contrast of tangy apple and buttery chicken is ridiculously good—like fall in a bite, but without the pumpkin spice overload.
- Weeknight to Dinner Party: Between us, this feeds six without breaking a sweat, yet it looks fancy enough for company. Serve it with mashed potatoes or a simple salad, and suddenly you’ve got a meal that’s both comforting and impressive—no one will guess it’s your go-to weeknight dinner.
Step-by-step instructions for juicy apple stuffed chicken
Here's how to create tender chicken breasts stuffed with a sweet-savory apple-celery mixture that stays juicy every time.
Prepare the Chicken and Stuffing Filling
Start by pounding the 1.5 lb boneless, skinless chicken breasts to an even ½-inch thickness between two sheets of plastic wrap. This ensures even cooking and prevents the filling from bursting out. While the chicken rests, peel and dice the 2 medium Granny Smith apples into small cubes—about ½-inch pieces—and finely chop the 3 whole celery stems (you should have roughly ½ cup chopped celery).
In a medium bowl, combine the diced apples, chopped celery, 0.25 cup fresh sage leaves, 1 tbsp fresh thyme leaves, 0.5 tsp cinnamon, 0.25 tsp ground nutmeg, 1.5 tsp salt, and 0.5 tsp ground black pepper. Add the 0.5 cup cold, cubed unsalted butter and toss gently until the butter coats the mixture. The filling should look vibrant and fragrant—this is where the magic happens. Set aside while you prepare the chicken.
Create the Crispy Breadcrumb Coating
In a shallow bowl, mix the 0.25 cup all-purpose flour, 0.5 cup panko breadcrumbs, 1.5 tsp salt, and 0.5 tsp ground black pepper. This coating will create a golden, crispy crust that contrasts beautifully with the tender filling inside. Brush both sides of each chicken breast lightly with 2 tbsp olive oil, then press them gently into the breadcrumb mixture, coating evenly on all sides. The oil helps the breadcrumbs adhere better and creates a crispier texture.
I like to press the breadcrumbs firmly—this ensures they stick well during cooking. Let the coated chicken rest for 5 minutes while you preheat your oven to 375°F. This resting time helps the coating set slightly, preventing it from falling off when you stuff the chicken.
Stuff and Sear the Chicken
Carefully open each chicken breast to create a pocket large enough to hold about ¼ of the apple-celery filling. Spoon the filling into the center of each breast, pressing it down gently to fit snugly. Fold the chicken over the filling and secure it with toothpicks if needed—this keeps everything contained while cooking. Place the stuffed chicken on a parchment-lined baking sheet.
Heat a large oven-safe skillet over medium-high heat and add the stuffed chicken. Sear for 2-3 minutes per side until the breadcrumb coating turns golden brown and the edges are crispy. The chicken should release easily from the pan—this is your signal that it's ready for the oven. Transfer the skillet to the preheated 375°F oven and bake for 20-25 minutes, or until the internal temperature reaches 165°F.
Finish with Lemon and Rest
Remove the chicken from the oven and let it rest for 5 minutes before removing the toothpicks. Drizzle each piece with 1 tbsp fresh lemon juice—this brightens the flavors and cuts through the richness of the butter and breadcrumbs. The lemon juice also helps keep the chicken moist by preventing it from drying out during the final resting period.
For the best results, serve the chicken immediately while it's still warm. The filling should be tender and fragrant, with the apples releasing their natural juices into the meat. Each bite should deliver a perfect balance of sweet, savory, and herby flavors, all wrapped in a crispy, golden crust. Pair with a simple green salad or roasted vegetables for a complete meal.
Pro Tips For Making Apple Stuffed Chicken
- Pound Chicken Evenly: Use a meat mallet or rolling pin to flatten the breasts to a uniform ½-inch thickness—this prevents uneven cooking and lets the apple filling heat through properly. I used to skip this, and one side always ended up dry while the other was raw.
- Core Apples Like a Pro: Slice the Granny Smith apples into ¼-inch thick rounds, then cut each round into 4 wedges—this keeps them from shrinking into mush during cooking. After burning three batches of soggy filling, I finally realized thin, even pieces are non-negotiable.
- Don’t Overstuff the Chicken: Pack the apple-celery mixture loosely into the butterflied breasts—overfilling makes them burst open and lose moisture. Aim for a snug but not tight fit, or you’ll end up with a messy pan and undercooked centers.
- Sear Before Baking: Pat the stuffed breasts dry, season with salt, and sear them skin-side down in a hot pan with butter for 2 minutes before baking—this locks in juices and builds flavor. I was skeptical until I tried it: the crust stays intact, and the apples caramelize better.
Make-ahead tips for leftovers
Prep Ahead Filling
The apple-celery filling is the heart of this dish and can be made up to 2 days in advance. Store it in an airtight container in the refrigerator, allowing it to sit at room temperature for 15-20 minutes before stuffing to prevent condensation.
I like to prep this on Sunday for a stress-free weeknight dinner—just stuff and bake when ready. 🍎
Stuffed Chicken Make-Ahead
Assemble the stuffed chicken (including breadcrumb coating) and refrigerate for up to 12 hours before cooking. When ready to bake, simply sear and finish in the oven as directed. The breadcrumbs will crisp up beautifully even after chilling, and the filling stays perfectly intact.
This is my go-to strategy for holiday entertaining—prep everything ahead and enjoy a relaxed cooking day. 🎄
Reheating Leftovers
Leftovers reheat beautifully in a 350°F oven for 15-20 minutes covered with foil, or until reaching 165°F internal temperature. For microwave reheating, cover with a damp paper towel and heat in 30-second intervals on medium power.
The filling actually tastes better the next day as the flavors meld together—trust me, it's worth saving for lunch! 💫
Freezer-Friendly Assembly
For longer storage, assemble the stuffed chicken (coated but unstuffed) and freeze on a parchment-lined tray for 1 hour to solidify. Transfer to a freezer bag for up to 3 months.
Thaw overnight in the fridge before cooking as directed. The breadcrumb coating stays crispy even after freezing—just add 5-10 extra minutes to the baking time. ❄️
Filling Variations
Make the filling ahead but customize it last-minute. Swap ½ cup dried cranberries for extra tartness or add 2 tbsp chopped walnuts for crunch. I also love adding 1 tsp orange zest to the filling for a citrusy twist—just store it separately until ready to mix.
These variations work perfectly with prepped filling. 🍊
Serving Prep
Set the table and prep sides while the chicken rests. Roast baby potatoes at 400°F for 30 minutes while baking the chicken, or assemble a simple arugula salad with lemon vinaigrette.
The lemon juice you drizzle on the chicken doubles as a perfect salad dressing—just whisk 2 tbsp olive oil with 1 tbsp lemon juice and a pinch of salt. 🥗
Nutrition facts
Frequently asked questions
Can I use chicken thighs instead of breasts for this recipe?
Chicken thighs actually work even better—they stay juicier and more forgiving during cooking. Use 2 bone-in, skin-on thighs (about 1.5 lbs total) and adjust the baking time to 30-35 minutes at 375°F. Skip the pounding step since thighs don't need it, but pat them dry first for better browning.
What if my chicken filling leaks while cooking?
This happens when the chicken isn't thick enough or the filling isn't packed tightly. For breasts, pound them to ½-inch thickness and press the filling firmly into the center. Use toothpicks to secure the chicken, and avoid overstuffing—leave ¼-inch space between the filling and edges.
How do I prevent the breadcrumbs from getting soggy?
The secret is in the prep: coat the chicken thoroughly with breadcrumbs before stuffing, and let it rest 5 minutes before searing. Also, bake on a wire rack over a baking sheet to allow air circulation. For extra crispiness, broil for 1-2 minutes at the end (watch closely to avoid burning).
Can I make this recipe without an oven?
Yes! Sear the stuffed chicken in a skillet over medium-high heat for 8-10 minutes per side, then finish in a 400°F oven for 10-12 minutes (if you have one) or under the broiler for 5 minutes. For stovetop-only, cover and cook on low heat for 15-20 minutes until internal temp reaches 165°F.
What's the best way to reheat stuffed chicken?
Oven reheating gives the best results: cover with foil and bake at 350°F for 15-20 minutes until heated through. For microwave, use 30-second intervals on medium power with a damp paper towel. The filling actually tastes better reheated as flavors meld—just add a splash of water or lemon juice to keep it moist.