
Main Courses
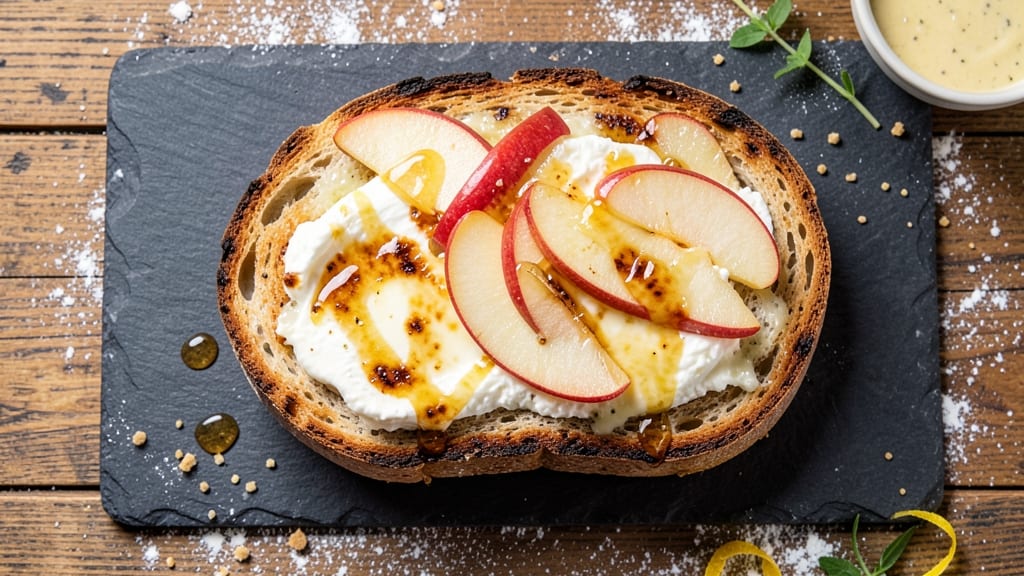
This brie and apple grilled cheese recipe transforms a classic comfort food into something unexpectedly sophisticated—crispy golden edges, gooey melted cheese, and tender caramelized apples in every bite.
I developed this version after years of perfecting the balance between crispy texture and melty layers, using a French technique that ensures the bread stays tender while the cheese reaches that perfect stretch. The secret? Caramelizing the apples just enough to bring out their natural sweetness without turning them mushy.
What sets this apart is the combination of brie's creamy richness and apples' bright acidity, creating a flavor profile that's both comforting and refined.
You'll start by thinly slicing the apples and cooking them in butter until they're tender but still hold their shape—this step elevates the sandwich from ordinary to extraordinary. The bread, lightly toasted until crispy, provides the perfect contrast to the soft, melty center.
The result is a grilled cheese that's crispy on the outside and lusciously gooey on the inside, with pockets of caramelized apple and brie that melt into every bite.
This isn't just a sandwich—it's a meal that feels special enough for a weekend brunch but simple enough for a weeknight dinner. Serve it with a drizzle of honey or a side of arugula salad to round out the flavors.
Ready in just 15 minutes, this recipe delivers restaurant-quality results without the fuss. The technique is straightforward, but the payoff is a sandwich that tastes like it came from a gourmet deli. Let's get started!
Ingredients for brie and apple grilled cheese
Crispy edges, gooey brie, and caramelized apples—here’s what you’ll need for this elevated grilled cheese.
| Ingredient | Amount | Notes |
|---|---|---|
| Brie Cheese 🧀 | ½ lb | Rind removed, sliced thin |
| Apples 🍎 | 1 medium | Thinly sliced, Honeycrisp preferred |
| Unsalted Butter 🧈 | 2 tbsp | Cold, cut into small pieces |
| Sourdough Bread 🍞 | 4 slices | Thick-cut, crust removed |
| Honey 🍯 | 1 tbsp | For drizzling after cooking |
| Extra-Virgin Olive Oil 🫒 | 1 tsp | For brushing bread |
| Garlic Cloves 🧄 | 1 whole | Minced for butter mixture |
| Salt 🧂 | ¼ tsp | Diamond Crystal preferred |
| Black Pepper 🌶️ | ⅛ tsp | Freshly ground |
| Cinnamon 🌿 | ⅛ tsp | Optional, for apple caramelization |
| Arugula 🌱 | 1 cup | For serving, optional |
The brie is non-negotiable here—look for a wedge with a creamy texture and minimal rind. Whole Foods or Trader Joe's carry excellent options, but any quality brie will work. Apples should be crisp and sweet—Honeycrisp or Fuji are ideal, but Granny Smith adds a nice tart contrast. Thinly slice them (about 1/8-inch thick) so they caramelize quickly without turning mushy. The sourdough is key too—its tangy flavor complements the sweet apples and rich brie. Bread with a tight crumb holds up better to the butter and cheese.
No brie? Camembert or Gruyère work in a pinch, though the flavor will differ. Substituting apples? Pears or peaches add sweetness, but reduce the amount by half since they're softer. Running low on butter? Vegan butter or olive oil keeps things crisp, though butter gives that signature richness. The garlic in the butter mixture is optional but adds depth—skip it if you're sensitive to strong flavors. For the cinnamon, start with half the amount and adjust to taste; it enhances the apple flavor without overpowering.
Store brie in its original packaging with a slice of bread to absorb moisture—keeps for 2-3 weeks in the fridge. Apples last 1 week in the fridge if sliced, but caramelize best when fresh. The sourdough? Wrap tightly in a bag to prevent drying. This sandwich reheats beautifully—5 minutes in a toaster oven restores that crispy edge. Leftovers? Freeze between parchment paper for up to 1 month—toast straight from frozen for a quick meal.
Why You'll Love This Recipe
- Five-Ingredient Magic: I swear by this combo—just butter, brie, apple slices, sourdough, and honey. That’s it. No chopping mountains of veggies or hunting for obscure spices. Honestly, I keep the ingredients in my fridge just for this.
- Sweet-Savory Bliss: The brie gets all gooey, the apples caramelize just enough to stay crisp, and that drizzle of honey? It ties everything together like a hug. I’ll be real: the first bite makes me pause mid-chew. Worth it.
- Weeknight or Guest Night: Same recipe, two vibes. Throw it together for a lazy Sunday brunch or impress someone unexpected with minimal effort. My roommate’s friends still ask for it months later—no one suspects how little work went into it.
- Leftovers? Even Better: The sandwiches reheat beautifully, and the next day, the brie’s even more melty. I pack extras for lunch without guilt—it’s basically a gourmet lunchbox. (Yes, even on a Tuesday.) Plus, using sourdough means less waste than baguettes.
Step-by-step instructions for brie and apple grilled cheese
Master the perfect balance of gooey brie, sweet apples, and crispy edges with these precise techniques.
Prepare the Apple and Butter Mixture
Core the 1 medium apples and slice them thinly into ⅛-inch pieces. Toss them with 0.125 teaspoon cinnamon and set aside. In a small bowl, combine the 2 tablespoons cold unsalted butter with the minced 1 whole garlic cloves, 0.25 teaspoon salt, and 0.125 teaspoon black pepper. Mix until evenly distributed and set aside at room temperature.
The cinnamon enhances the apple flavor while preventing browning. Cold butter creates a better spread that won't melt immediately when you assemble the sandwich. This mixture adds depth beyond just cheese and bread.
Assemble the Grilled Cheese with Precision
Lay out the 4 slices sourdough bread on a clean surface. Brush two slices lightly with ½ teaspoon extra-virgin olive oil on one side only. Place the brie cheese slices on the unbrushed sides of two bread slices, then divide the apple mixture evenly between them. Top with the remaining two bread slices, oiled side down.
Press down gently on the sandwiches to ensure even contact between layers. The olive oil creates a barrier that prevents sticking while promoting crispy edges. Don't overfill—this ensures proper melting and even browning.
Cook to Perfect Crispy Edges
Heat a nonstick skillet over medium heat. Add the sandwiches and cook for 3-4 minutes per side until the bread is golden brown and the cheese is fully melted. You'll see bubbles form around the edges—that's your signal for flipping.
Watch carefully as the brie melts and the edges crisp. If the bread browns too quickly, reduce heat slightly to prevent burning. The apples should soften slightly but retain their shape. Remove from heat when the cheese is completely melted through.
Finish and Serve Immediately
Transfer the sandwiches to a cutting board and drizzle with the 1 tablespoon honey. Allow them to rest for 1 minute before cutting diagonally into triangles. Serve immediately with 1 cup arugula on the side for a fresh contrast.
The honey adds a perfect sweet finish that complements the salty brie and tart apples. Serving with arugula balances the richness while adding texture. This sandwich is best enjoyed fresh when the cheese is at its gooiest and the bread is crisp.
Pro Tips For Making Brie And Apple Grilled Cheese
- Prep Apples Like a Pro: Thinly slice apples—no need to peel—then toss them in lemon juice while you butter the bread. This keeps them from browning while you assemble, and the acidity cuts through the sweetness later.
- Butter Generously, Inside Too: Use two tablespoons of butter per sandwich—one side of the bread, one on the cheese. I learned this the hard way: skimping means the brie won’t melt evenly, and your grilled cheese will stick like glue. (Yes, even if you’re impatient like me.)
- Press Hard, Then Wait: Slap the sandwich together and press down firmly on the pan for 10 seconds—this seals the bread. Then lower the heat to medium-low and let it cook undisturbed for 3–4 minutes. Rushing this step = soggy bread.
- Honey After Grilling: Drizzle honey after the sandwich is golden, not before. The heat will caramelize it slightly, giving you that perfect balance of sweetness without making the apples turn to mush. (Your future self will thank you.)
Essential equipment for this recipe
Nonstick Skillet
I swear by a 10-inch nonstick skillet with a flat base—like the All-Clad Stainless Nonstick or GreenPan Cerama—for perfect grilled cheese. The nonstick surface prevents sticking while achieving crispy edges.
If you don’t have nonstick, a well-seasoned cast iron works too, but you’ll need to add a touch more butter to prevent sticking. 🔥
Butter Knife
A sharp butter knife (at least 4 inches long) is essential for spreading the garlic butter evenly. I prefer Mercer Culinary’s stainless steel knives—they glide through butter without tearing. A dull knife will smear your mixture, making assembly messy. Keep it nearby for quick spreading during assembly.
Slicing Tools
For apples, use a mandoline (set to ⅛-inch thickness) for even slices, or a sharp chef’s knife. A Japanese pull-cut knife like Global’s works beautifully for clean, thin slices.
For brie, a slicing knife (like Wüsthof’s) ensures even layers. Thin, uniform slices melt evenly and create that perfect gooey texture. 🍎
Cutting Board
A large cutting board (at least 12x18 inches) gives you space to assemble sandwiches without crowding. I love bamboo boards—they’re gentle on knives and easy to clean.
Avoid glass or marble; they can get too hot and melt butter too quickly. A non-slip mat underneath keeps everything stable while you press down.
Honey Drizzler
A small honey drizzler (like a mini squeeze bottle) makes finishing your sandwiches effortless. If you don’t have one, a clean spoon or small ladle works in a pinch.
Drizzle just before serving so the honey doesn’t pool—this keeps the sandwich crispy. A light touch is key; too much honey can overwhelm the brie’s richness. 🍯
Optional: Toaster Oven
For a hands-off approach, a toaster oven (like Breville’s Smart Oven) lets you cook multiple sandwiches at once. Preheat to 350°F, place sandwiches on the rack, and toast for 5-7 minutes until golden.
This method is great for parties or when you’re cooking more than one sandwich. Just watch closely—ovens can dry out bread faster than a skillet.
Nutrition facts
Frequently asked questions
Can I use a different type of cheese instead of brie?
While brie is ideal for its creamy texture, Camembert or Gruyère work beautifully too. For a sharper flavor, try aged Gouda or smoked cheddar. Just keep in mind that softer cheeses will melt more dramatically, while harder cheeses may require slightly higher heat. The key is to choose a cheese with good melting properties.
How do I prevent the bread from getting soggy?
To keep your sandwich crispy, brush the bread lightly with olive oil before cooking—this creates a barrier that prevents moisture from the cheese and apples from seeping in. Also, make sure your skillet is properly heated before adding the sandwich. If using a toaster oven, cook at 375°F for 4-5 minutes to maintain crispiness.
What's the best way to reheat leftovers?
Reheat in a toaster oven at 350°F for 3-4 minutes to restore crispy edges. If using a skillet, cook over medium-low heat for 1-2 minutes per side—just enough to melt the cheese without burning. Avoid microwaving, as it makes the bread rubbery. Leftovers taste best within 2 days when stored properly.
Can I make this recipe ahead of time?
Assemble the sandwiches (without cooking) up to 4 hours ahead and wrap tightly in plastic wrap. Refrigerate until ready to cook. For the apples, caramelize them just before assembling to keep them crisp. The bread will soften slightly when cold, so toast it longer when reheating. This method works well for meal prep—just cook fresh for the best texture!
Why did my cheese not melt all the way?
This usually happens if the skillet wasn't hot enough or the cheese was too cold. Heat your skillet over medium-high heat for 2-3 minutes before adding the sandwich, and let it cook undisturbed for 3-4 minutes per side. Using room-temperature cheese also helps it melt more evenly. If it still doesn't melt, try a slightly higher heat next time.